How to Read and Control PWM Fan Speed on AML-S905X-CC

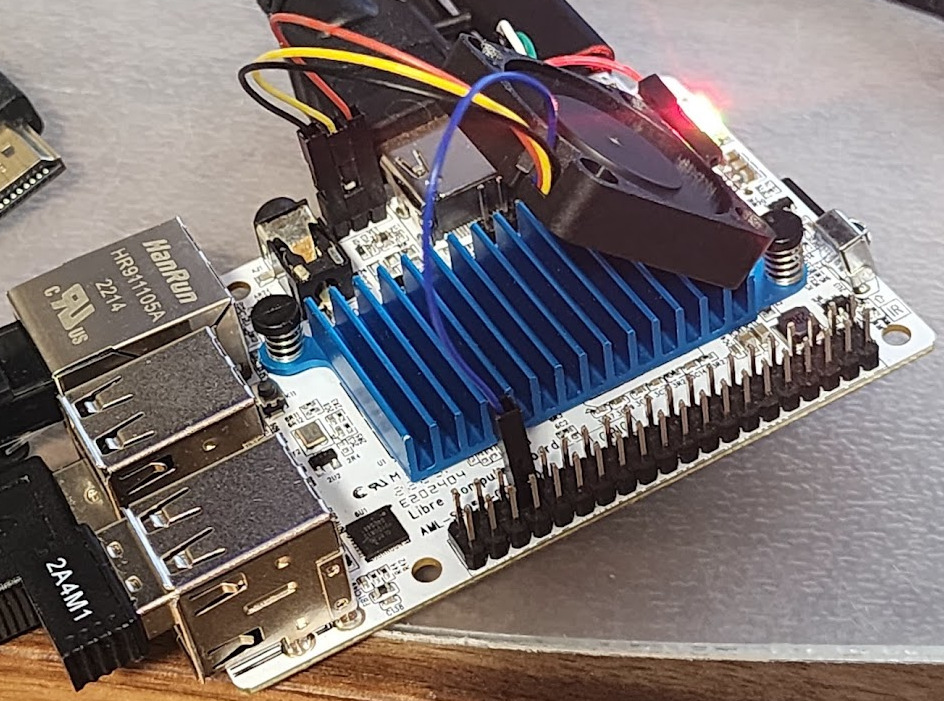
PWM fans come with 4 wires:

  1. Ground
  2. Power (3.3V, 5V, 12V)
  3. Tachometer
  4. PWM speed control

Per the GPIO map, there is a convenient header 9J1:

  1. Ground
  2. GPIO (for tach)
  3. 5V

On the 40-pin header, there are 5 hardware PWMs we can use per our PWM guide. We do not want to waste CPU cycles to generate inaccurate PWM via software GPIO bitbanging.

We can hook these up to the fan via female to male jumper wires.

  • pwm-a - Pin 33
  • pwm-ao-a - Pin 11
  • pwm-ao-b-6 - Pin 12
  • pwm-ao-b-9 - Pin 13
  • pwm-e - Pin 32
  • pwm-f - Pin 35

To test with PWM A on pin 33:

sudo ldto enable pwm-a
sudo ldto enable pwm-a-fan

This will create a hwmon device in /sys/class/hwmon/.
The fan speed can be read from the file fan1_input in the hwmon device directory: cat fan1_input
The pwm level (0-255) can be set by the file pwm1 in the hwmon device directory. echo 0 | sudo tee pwm1

To make it permanent:

sudo ldto merge pwm-a
sudo ldto merge pwm-a-fan

From here, you can write userspace software in any language to implement control systems by reading fan1_input and writing to pwm1.

Most users prefer to link fan speed to SoC temperatures. To enable temperature-based fan speed control, run the previous merge commands and then add:

sudo ldto merge pwm-a-fan-auto

After rebooting, fan speed should be directly controlled by SoC temperatures. This profile deactivates the fan < 50C and peaks at 60C for maintaining maximum performance.

2 Likes

Ok so on the 3 wire PWM fans and 2 wire fans that we can control with a transistor.
Which pins would you use for the fan switching and which for the tac? It doesn’t say

And does PWM turn the fan on and off automatically?

I don’t have a PWM fan to test this with, but it looks like they’re talking about pin 9J1 2 , and you have to work out how you want to control it, whether that be a python script or whatever.

I’m not sure on the others, I Just keep my 2 wire 5v 30mm fan on all the time. It’s quiet.

3 wire fans are not PWM. They are DC fans that require the input voltage to change. Header pins are static voltage and not dynamic so 3 wire fans can only sense speed with no speed control.

4 wire fans have a static input voltage pin and vary speed via PWM signal. Don’t confuse the two.

Using latest Raspbian image form downloads section for the board

For some reason the final step just didn’t work. “sudo ldto merge pwm-a-fan-auto” just kept poping up saying could not be created.
So for a work around I installed fancontroller and lm-sensors. I ran my fan wires exactly as shown in your image BYR in S/PDIF Header and Blue running to pin 33. sensors detected the pwm1 and temp1_input for the CPU no issue. following this guide here. https://www.libe.net/en-fan-control-debian#sudo-pwmconfig

but when I got to running sudo pwnconfig the fans would turn off but not back on drove me crazy. figured out pwmconfig would set pwm1_enable to a value of 0 and pwm1 to a value of 0. without a 1 in the pwm1_enable file the pwmconfigure program thought my fans had died.
nuts to all of that I just needed a clean config file that’s all.
here’s what I did.
took root using sudo su
then
cd /sys/class/hwmon/hwmon1
from here as root I did this
pwmconfig && echo 1 | sudo tee pwm1_enable && echo 255 | sudo tee pwm1
that command just ran pwmconfig but then enabled pwm1 and set pwm1 value to 255 the setting pwmconfig wanted to set.
after that i finished the config wizard then saved and closed
now to see if i can do the same to the Emuelec image

pwm-a-fan-auto is not pushed via apt yet. You have to manually clone the git repo, make, and use the repo ldto to enable that overlay.

1 Like

Can you please share the link to this git repo and some more details on how to do this (newbie here)? The only step I am having trouble is pwm-a-fan-auto one. I understand the purpose of that command, just not sure where to download it from and how to apply it. Thanks!

Since we have to install the wiring tool from GitHub I think they meant to say from the command line you’ll likely need to:
Scroll to install git version instructions:

sudo apt install git
git clone [GitHub - libre-computer-project/libretech-wiring-tool]
cd libretech-wiring-tool
sudo ./install.sh

That will install the version of the wiring tool that lets us set the temp control fan.

From there we just set it up as posted:

sudo ldto enable pwm-a
sudo ldto enable pwm-a-fan
sudo ldto merge pwm-a
sudo ldto merge pwm-a-fan
sudo ldto merge pwm-a-fan-auto
sudo reboot

This is already installed on our images, there’s no need to clone the repo unless you need something that has not been pushed yet.

you said we have to clone to get pwm 1 fan auto, Just got a renegade I’ll try it now without pulling…

On the latest images or if you run apt dist-upgrade, these are already in the images. There’s no need to clone anymore.

Am I correct in understanding that there’s no documented way to achieve this configuration while using a LibreElec OS image?

LibreELEC uses a non-standard boot chain so it will require complex manual tweaks.

Hello… I would like to connect a fan with just two wires, one positive wire and one negative wire… could you help me with how to connect it? What pins do I have to use? What would be the positive pin and negative pin on the board? Thanks

Put the red wire on 5V or 3.3V and the black wire on ground.

friend I got it. I saw that the board box had information on where the pins were. The fan is already working. thank you very much