Libre Computer Flash Tool

Libre Computer Flash Tool on GitHub

This tool is currently used to flash bootloaders onto MicroSD cards or eMMC modules exported as USB Flash drives.
sudo ./lft.sh bl-flash BOARD_MODEL BLOCK_DEVICE
Replace BOARD_MODEL with a model from ./lft.sh b-list
Replace BLOCK_DEVICE with a device from ./lft.sh dev-list
Please note that this tool may destroy GPT partition tables so we recommend that you back up any valuable data on the target device.

This tool can also run the eMMC detection routine again to allow hot plugging of modules.

sudo ./lft.sh b-emmc rebind

Thanks for this. Thought I would just like to share my experience in the hope that it might help others. I did this with an AML-S905X-CC (V1)

  1. I used a MicroSD. I found that this procedure worked when the partition on the MicroSD was MBR.
  2. Mine worked when the MicroSD was completely blank. By that I mean that there was an MBR partition but it had not been formatted.
  3. Flash the blank MicroSD using the tool. Make sure you specify the right board in the flash command.
  4. You boot from the MicroSD card prepared by the tool and it then picks up the OS on your USB (in my case a mSata SSD in USB enclosure).
  5. If you want to migrate an installation you already have on a MicroSD, back it up with Win32DiskImager and restore to your USB.

Tip: If you are using an AML-S905X-CC the version is printed on the top of the board itself.

The only downside I’ve found is that the keyboard won’t respond at the actual command prompt. Not sure why. Might be power draw of the mSata. My feeling is that it unrelated to the actual booting process. Over SSH it’s fine.

It’s certainty much much snappier than using the MicroSD as the OS host, even over USB2.

Keyboard should work at the prompt. We use it all the time.

Hi, I checked further after the initial post. The issue was as expected. The mSata SSD I was using put too much of a strain on the power so there wasn’t enough to power the keyboard’s USB dongle.

I setup a regular USB and low and behold the wireless keyboard worked perfectly.

I’m sure a wired keyboard would have been fine.

The instruction indicate to specify the target board’s model:

./lft.sh board-list
aml-s905x-cc-v2
aml-s905x-cc
all-h3-cc-h5
all-h3-cc-h3
aml-s805x-ac
roc-rk3399-pc
roc-rk3328-cc

How do I know if my Potato aml-s905x-cc is version 2 or not?

If I get this wrong, what error message will I receive?

The board is marked as V1 or V2 on the PCB.
Note that V2 is a completely different product from V1 and is not for sale yet. We do not increment major numbers for revisions.

I have the aml-s905x-cc board. There is only one main device showing (mmcblk1) as my sd disk. When I try to flash, it says the the device is a not a valid target. Just a thought here and stupid question:

Do I have to flash the sdcard from another computer? What I have done is install raspian, run it on the libre, then try to get the flash tool flashed on that same sdcard from the same computer.

By default, the tool blocks you from overwriting your boot device in case of accident. You have to add force to the end to force it to flash the device.

Is there any known problem with the current roc-rk3328-cc bootloader? I only get a steady red light on the board after flashing. I’ve tried multiple microSD cards including ones that have tested working with ubuntu/raspbian images. Is there any particular way the card should be formated prior to flashing?

If using the flash tool for ROC-RK3328-CC, the green light will turn off after it found the bootloader. u-boot does not yet support video so you won’t get any HDMI output until you get to Linux. UART is helpful in this regard. HDMI support was recently completed but it will be another week or two before we fully integrate it.

Dave, thank you for your advice. I have a stupid question, how do you flash to an sd of you already have the os in the potato to be able to access and install the bootloader?

Can this be done on windows?

No, this is a Linux only tool.

I don’t understand much about Linux, and I would like to do the step by step guide for people like me with no knowledge of Linux. I have Ubuntu server on my sweet potato board. with a windows computer using putty access to sweet potato.

Now let’s connect the putty…

Then I copy the command in the terminal:
git clone GitHub - libre-computer-project/libretech-flash-tool

01

Now let’s enter the libretech-flash-tool folder with the command:
cd libretech-flash-tool
02

Now let’s find out which disks are connected with the command:
./lft.sh dev-list
It lists all the disks on the board.
03

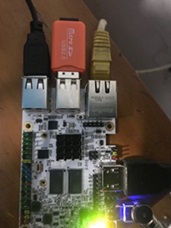
Now insert the adapter with the micro SD into the board
05

Now we run the ./lft.sh dev-list command again to find out the name of the micro sd
a
see that an SDA appeared which means that the micro sd card is called SDA

Now let’s install gdisk with the command:
sudo apt install gdisk -y
07

Now let’s prepare the micro SD, let’s delete its partition with the command:
sudo fdisk /dev/sda

a1

Now press the d and enter key and the w and enter key to exit.

Now let’s create a partition with the command:
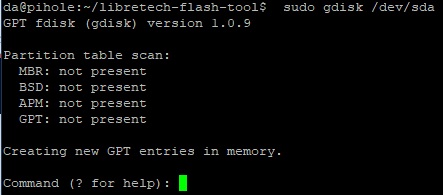
sudo gdisk /dev/sda
b1

Press the o key to create a partition
c1

press the w key to create the table and close
d1

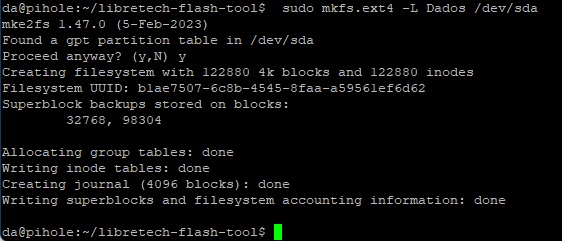
Now let’s format the micro SD with the command:
sudo mkfs.ext4 -L Data /dev/sda
e1

Now mount the disk with the command:
sudo mount -a

Finally, let’s download and install flash tools with the command
sudo ./lft.sh bl-flash
select the card from this list
aml-s905x-cc-v2
aml-s905x-cc
all-h3-cc-h5
all-h3-cc-h3
aml-s805x-ac
roc-rk3399-pc
roc-rk3328-cc
and point our micro sd.
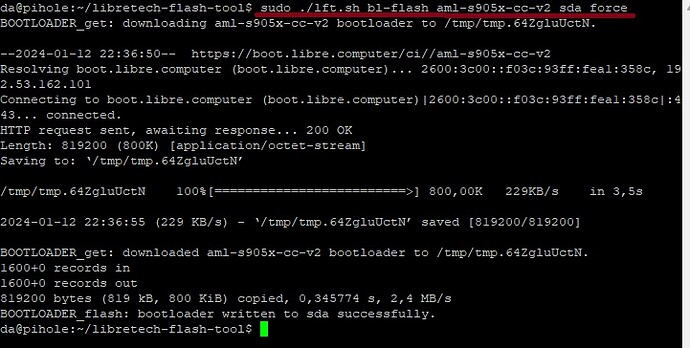
the command goes something like this:

sudo ./lft.sh bl-flash aml-s905x-cc-v2 sda force

my board is an aml-s905x-cc-v2 so after sudo ./lft.sh bl-flash I put the name of the board and the sda which is the micro sd card and force it to force recording on the micro sd.

Now just turn off the board, remove the micro SD from the USB adapter and connect it to the board and use the boot on the USB port.

I hope this helps those who are starting out like me and remember
No one was born knowing!

Sweet Potato has an onboard bootloader. It doesn’t need libretech-flash-tool. It can run any standard EFI compliant system image.

It’s a little confusing and difficult to find information about the board on the forum.
but I managed to boot the USB this way. and it was you who said I would have to use the tool. I’m a layman… you should have asked what my license plate was, but anyway.
the tool worked for me, now can you explain what this image would look like with efi?
I downloaded the image from your website, do you have any image compatible with EFI? remember I’m a layman…
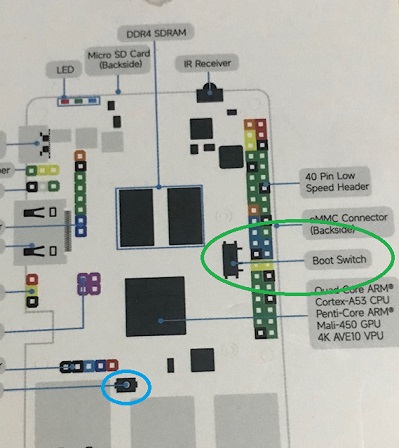
One more question: on the board there is a button saying it is boot, how does this button work? When I change the position of the button, the board doesn’t work… if you could teach me, a favor, what the button is for and how it works, thank you for your explanations!

All of our official images are UEFI based with Linux launched via UEFI application.

There are multiple buttons and switches on most boards. The button is for entering BootROM mode for very advanced vendor specific programming and recover. The switch (if present) is for enabling/disabling onboard UEFI BIOS.

IMG_1208
friend… the blue circle is a boot button, and the green circle is also a boot button… is this green circle button to activate or deactivate uefi?
When I change the position of this button, the card doesn’t show the video… and what could I be doing wrong because I downloaded your image, and it has UEFI, but it doesn’t start on USB… I tried updating the bios but still So it didn’t boot via usb… I only got the usb boot with the flash tools procedure… thanks!

Blue is the BootROM button for doing advanced recovery. The green is the boot switch to enable and disable UEFI bootloader.

UEFI bootloader, once enabled, will boot from any media including USB. If it doesn’t start, whatever is on your USB is not bootable.